

Hey there, I had some crazy life drama for awhile and hadn't done any DIY during that time period. I'm free from that and life is back on track. Looking forward to creating more awesome stuff!
-Athena
Tuesday, August 14, 2012

Wednesday, June 27, 2012
Tile Coasters

From the moment I saw this DIY tutorial, I wanted to try it out for myself!!! I did one set for me and one set for my mom for her birthday. I think they turned out really cute! They are pretty inexpensive, can send any message you'd like, and are quite fun to make.


I started out by tracing the tile onto scrapbook paper and cutting the paper out.
Next, I mod-podged the paper down (putting a layer of mod-podge directly on the tile, placed the paper onto the tile, and placed mod-podge on top).
I wanted these to be fun and full of life (like my mom) so I added sparkles in the mod-podge.
After allowing the mod-podge to dry and doing 1-2 more layers, I used some puff paint to just add some details and then used a laqure spray paint to seal them. (2-4 coats of this stuff just to be safe)
After they dried overnight, I added the felt pieces to the bottom to prevent scratches.
While looking at scrapbook paper, I found these awesome stickers and decided to make a coaster set for myself. I didn't want to go through the trouble of finding a background for these guys so I made them super simple.

I still had one sheet of my mustache scrapbook paper, so I decided to label what each of the mustache stickers were. I could have done a much better job with this, but this was my first trial (before the coasters for my mom).


I labeled each one with a sharpie paint pen and then lacquered each tile 2-3 times, allowing them to completely dry over night.


Monday, June 25, 2012
Coat rack/shelf
I found this coat rack at Micheal's for $3.00 because it was missing one of the pegs.
I removed the remaining three pegs, which, not surprisingly, came out on their own without much effort.

I filled the holes with some caulk (probably should have used a wood filler, but this is what I had available and on hand).


I used a putty knife to smooth out the caulk and make the hole flush with the rest of the wood.


After the caulk dried, I painted the wood with the brown paint I used for my garage cabinets.


I found these cute hooks for about $4 a piece at Home Depot. A little more then I wanted to spend, but I think they ended up looking really nice!

Monday, June 18, 2012
Electric Outlet Covers
I painted my kitchen wall "Neverland Teal" when I first moved in. It felt like it needed something so I decided to spice up the electric outlet covers. I found this DIY tutorial on Pinterest and decided to try it out for myself.


I started by removing the cover and getting my materials. I chose this fun blue and white pattern scrapbook paper bought during Micheal's "6 sheets for $1" sale. So worth it! I traced the cover on the paper and cut it out (leaving the whole inside in one piece). I traced where the holes WILL be, but left them alone for now.

Then, I covered the front of the cover in modpodge and placed the cut out paper in position.

After placing the paper on the cover, I covered the whole thing with more modpodge. Allow to dry and do 2-3 more coats (I did this due to it being in the kitchen so it would wipe easily).

Once it dried, I put it back into position.
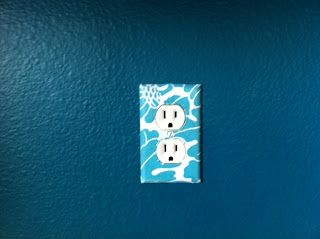

I found it was easier to get the screw in if I made a small incision in the paper before hand where the screw would go. I found that if you try cutting through the paper before it is COMPLETELY dry... the edges won't cut smoothly.

I found it was easier to get the screw in if I made a small incision in the paper before hand where the screw would go. I found that if you try cutting through the paper before it is COMPLETELY dry... the edges won't cut smoothly.
Credit: housewivesofriverton
Father's Day
For Father's day, my family had a BBQ at my parents' house. Each party, I try and do a small theme to keep everyone on their toes. Since this get together was about "FATHERS", I thought mustaches would be fitting. Everything was fairly cheap and really easy to make. When making pendants in this post (here), my cousin and I made some mustache pendants for the get together. I found some cute key chain pieces my mom had laying around, and they made for cute little gifts for everyone to take.

I used this tutorial (HERE) to create a mustache stamp. I used this to stamp the cards for father's day. The tutorial worked flawlessly.

I found this awesome scrapbook paper at Micheal's during their "6 sheets for $1" sale. I regret not getting more. I cut the paper down to size and placed it in a cheap frame from the dollar store. This made for some interesting conversation later on when we tried to figure out which mustaches we all had.

I glued paper cut out mustaches to some bamboo chopstick I found at the dollar store for some picture props. These turned out rather fun and got a few giggles from G.Pa.

By the end of the party, after eating great food, watching a 3 hours movie from the 60's, and laughing a little... I was pooped to say the least.

Subscribe to:
Posts (Atom)


 Posts
Posts


